Its Okay to Not Be Strong Zelda Fan Art Zelda Fountain Fan Art
How to create hitting Zelda fan art in 3D

The Legend of Zelda fan art is a fun endeavour for whatever 3D artist. Originally created by Japanese game designers Shigeru Miyamoto and Takashi Tezuka, the long-running video game series presents artists with a wealth of characters, creatures, weapons and environments to recreate in 3D. What's more, fan fine art can be a great mode of honing your artistic and technical skills or trying out new things entirely.
Pb modeller at Rainbow CGI, Claudio Amoroso, recreated The Legend of Zelda's hero Link in his ain piece of hit fan art. In this pace-by-step tutorial, Amoroso talks you through creating the final image. All you lot demand to follow along is a basic knowledge of ZBrush, a good cognition of your chosen poly modelling software and Photoshop. Don't forget you can heave your ZBrush skills with our roundup of the best ZBrush tutorials or compare 3D software with our best 3D modelling software guide.
Got what you need to get started? Then allow'due south find out how you can recreate Amoroso's impressive Zelda fan art.
How to create Zelda fan art
01. Sculpt the caput
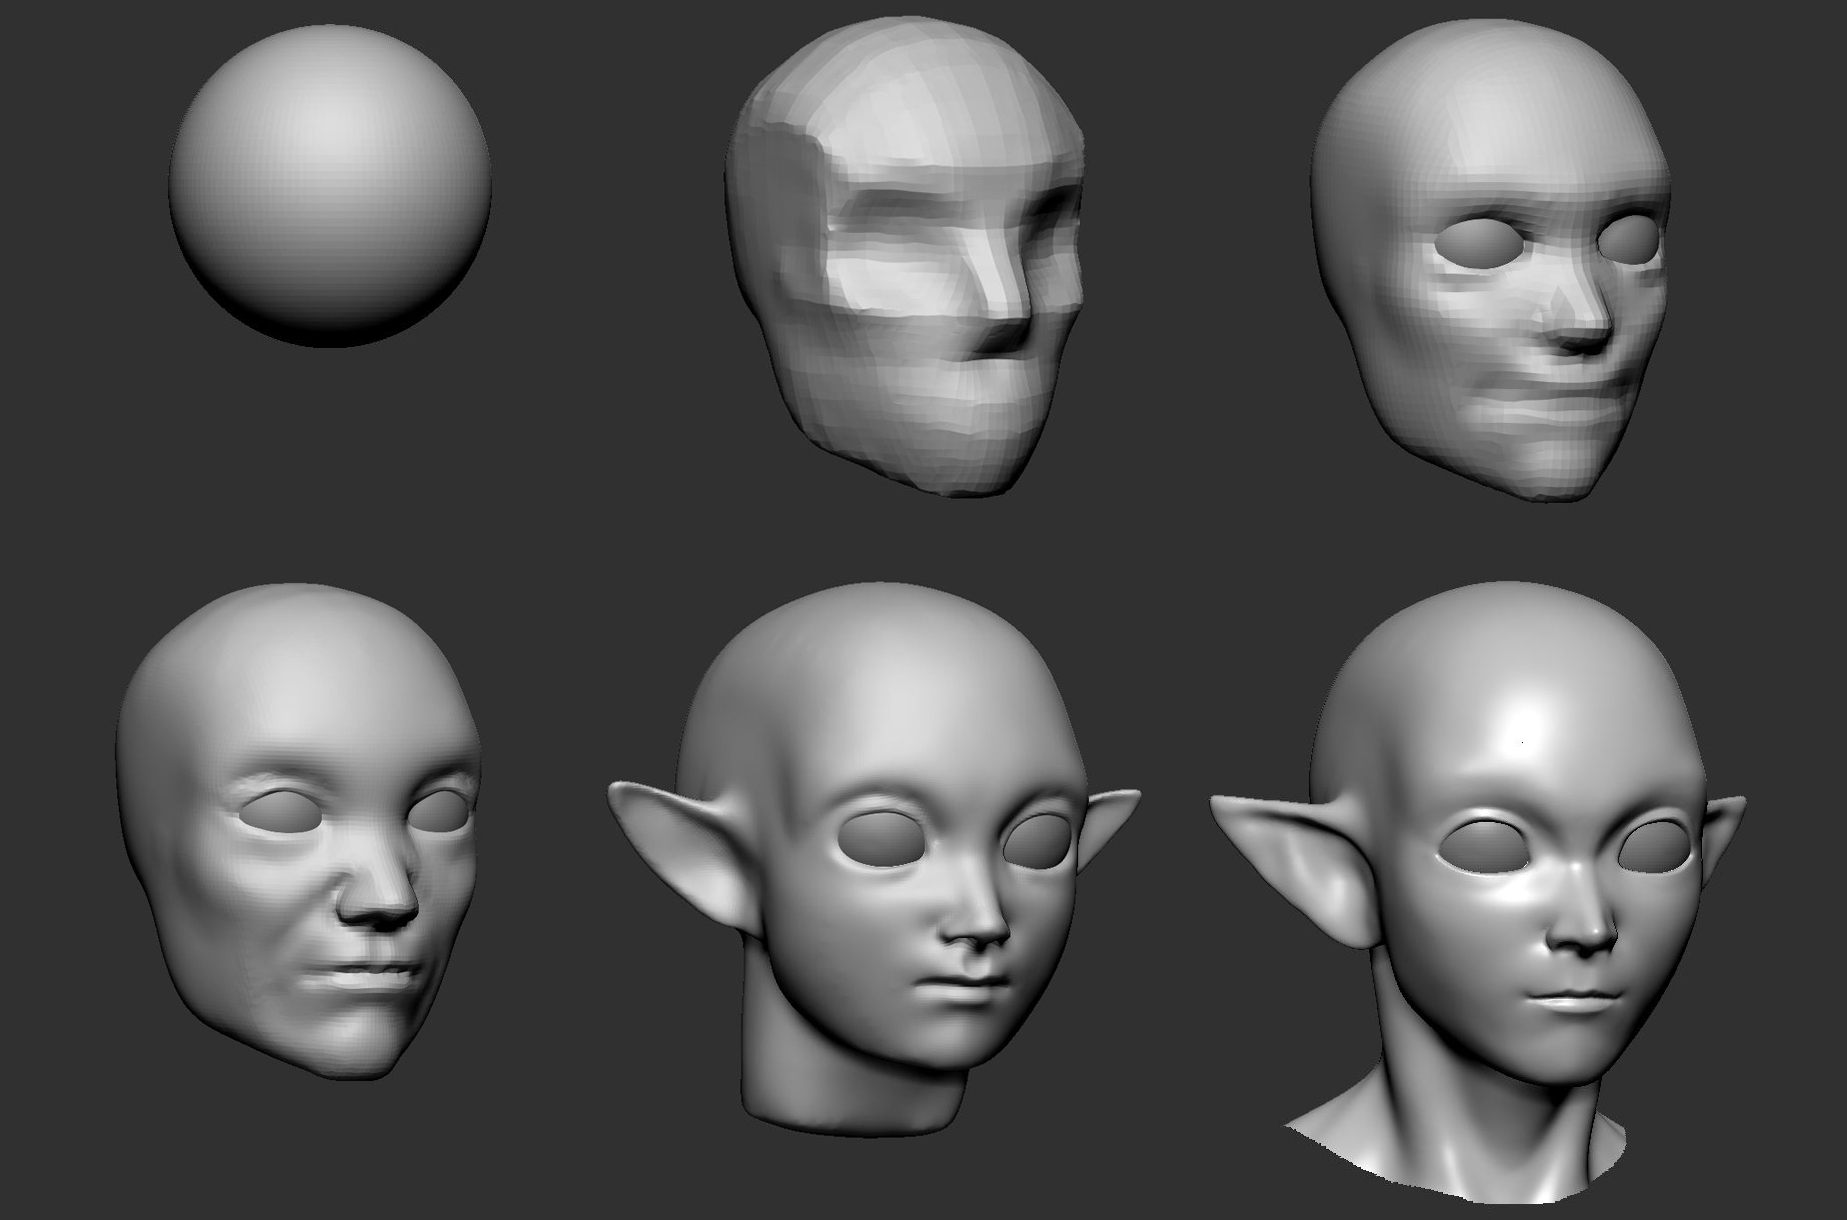
(Paradigm: © Claudio Amoroso)
To brainstorm, nosotros need to offset from a sphere in ZBrush with DynaMesh activated. At start, you lot don't demand to worry also much about the proportions of your reference, just start by blocking out the main shapes of a generic head. Adjacent, insert two spheres as subtools to simulate the volume of the eye bulb, which is going to help y'all define volumes of the eyelids.
Later on you have obtained a generic human head, you can kickoff moving volumes effectually in order to reach the desired proportion and style. You can smooth the anatomy details in order to go a more than cartoonish vibe, or you lot can push the anatomy towards realism. Exist aware that when creating the head yous are also setting the tone of the entire piece.
02. Use ZSpheres
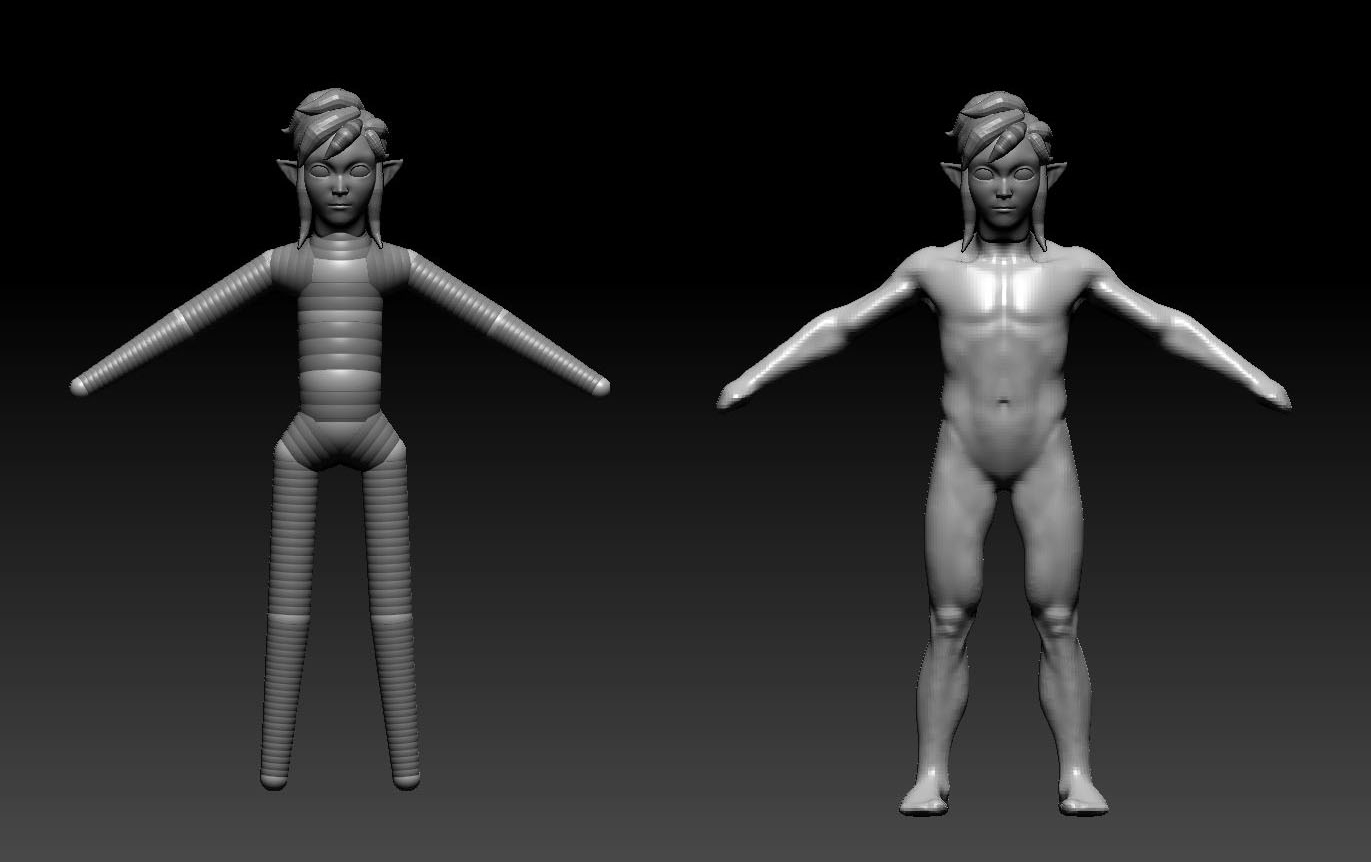
(Image: © Claudio Amoroso)
If your character has long hairs you lot can use ZSpheres to block out the main clumps. Keep each dodder equally a carve up subtool, equally they are going to be a useful guide for FiberMesh.
You can also employ ZSpheres to block out the body's chief proportions, and so convert them into a mesh and kickoff sculpting the body. Be aware of which parts of your grapheme are going to be covered – go on in mind that yous volition need the body book to build the clothes, but you don't want to spend also much time detailing covered parts. And so get information technology right, but keep information technology simple.
03. Merge and connect body parts
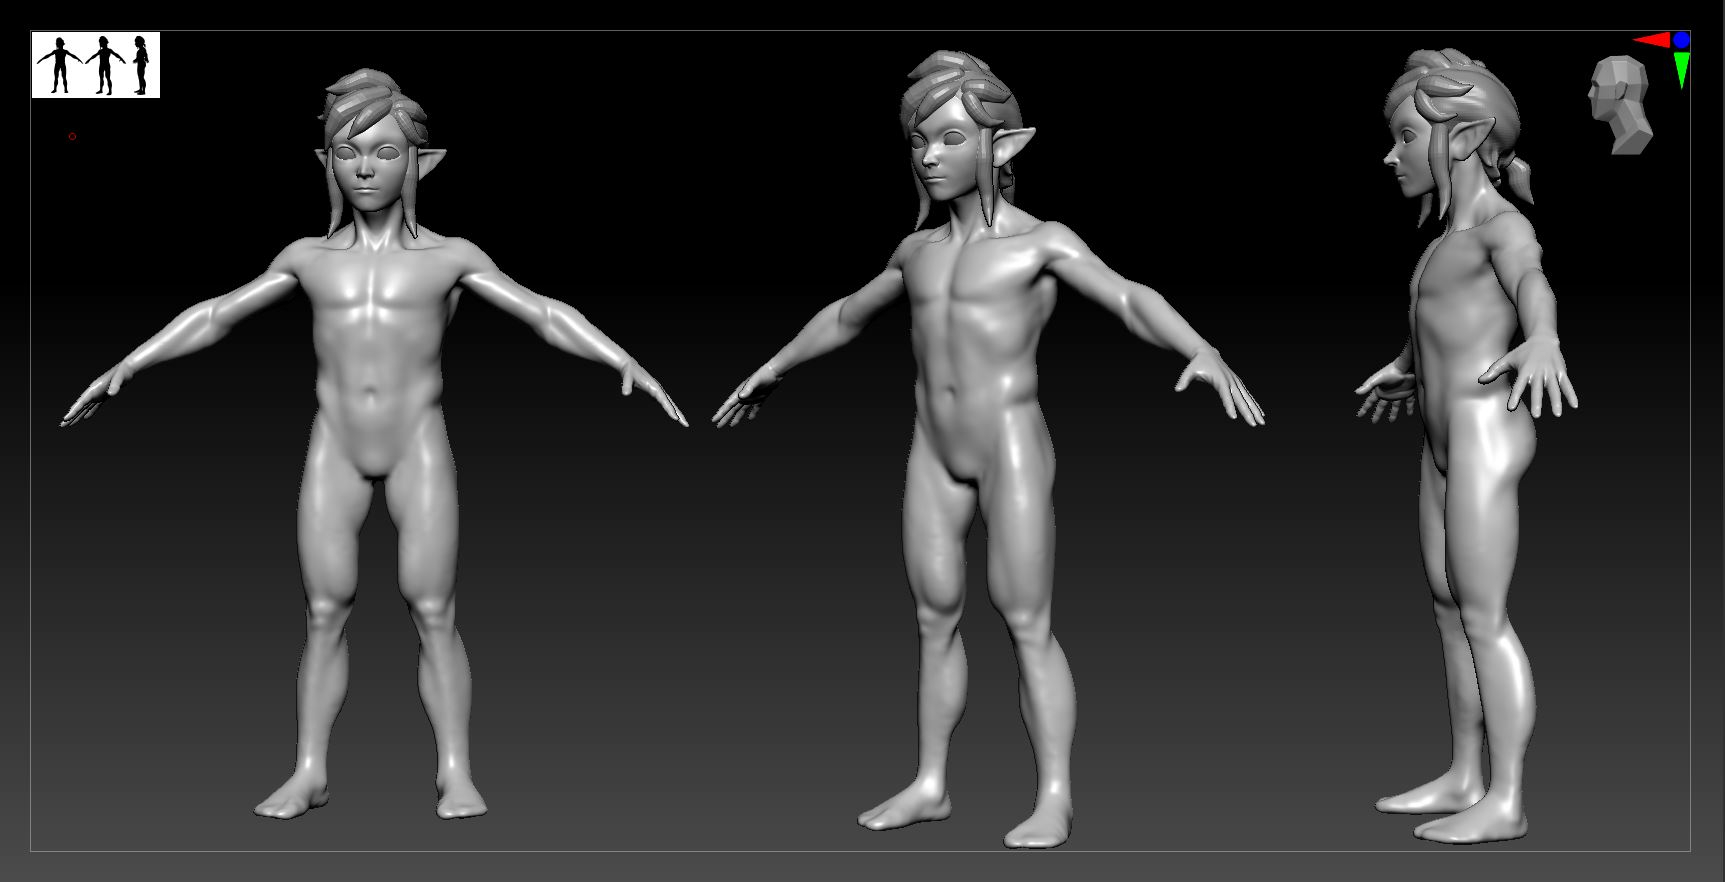
(Image: © Claudio Amoroso)
After all the body parts are completed you need to merge everything into one subtool. This stage is pretty straightforward but it'southward important to keep a few things in mind.
Check your DynaMesh, most likely you are going to stop upwards with a different resolution setting for each subtool y'all have created. So you need to find the subtool with the highest resolution number, then you can merge all of them (except for the eyes) and relaunch DynaMesh with that setting. This way you can prevent losing sculpted details. Now you tin can go along sculpting, blending all parts and finishing your body mesh.
04. Create clothes from the body
(Paradigm: © Claudio Amoroso)
Now that you have a base mesh we tin can start sculpting some clothes for our grapheme. The key here is to separate out all the layers, starting from the well-nigh adherent to the loosest. But mask the expanse covered by the garment, then you tin either use the Extract function or duplicate the body subtool and use Ctrl+W to polygroup the masked area, isolate information technology, and delete subconscious geometry.
Upon isolating garments, you need to go a cleaner topology. ZRemesher is more than enough to become the job washed, but feel gratuitous to use any retopology tool you are comfortable with. After applying thickness to garments you lot can start adjusting and sculpting them but, for now, don't waste too much fourth dimension on the detailing.
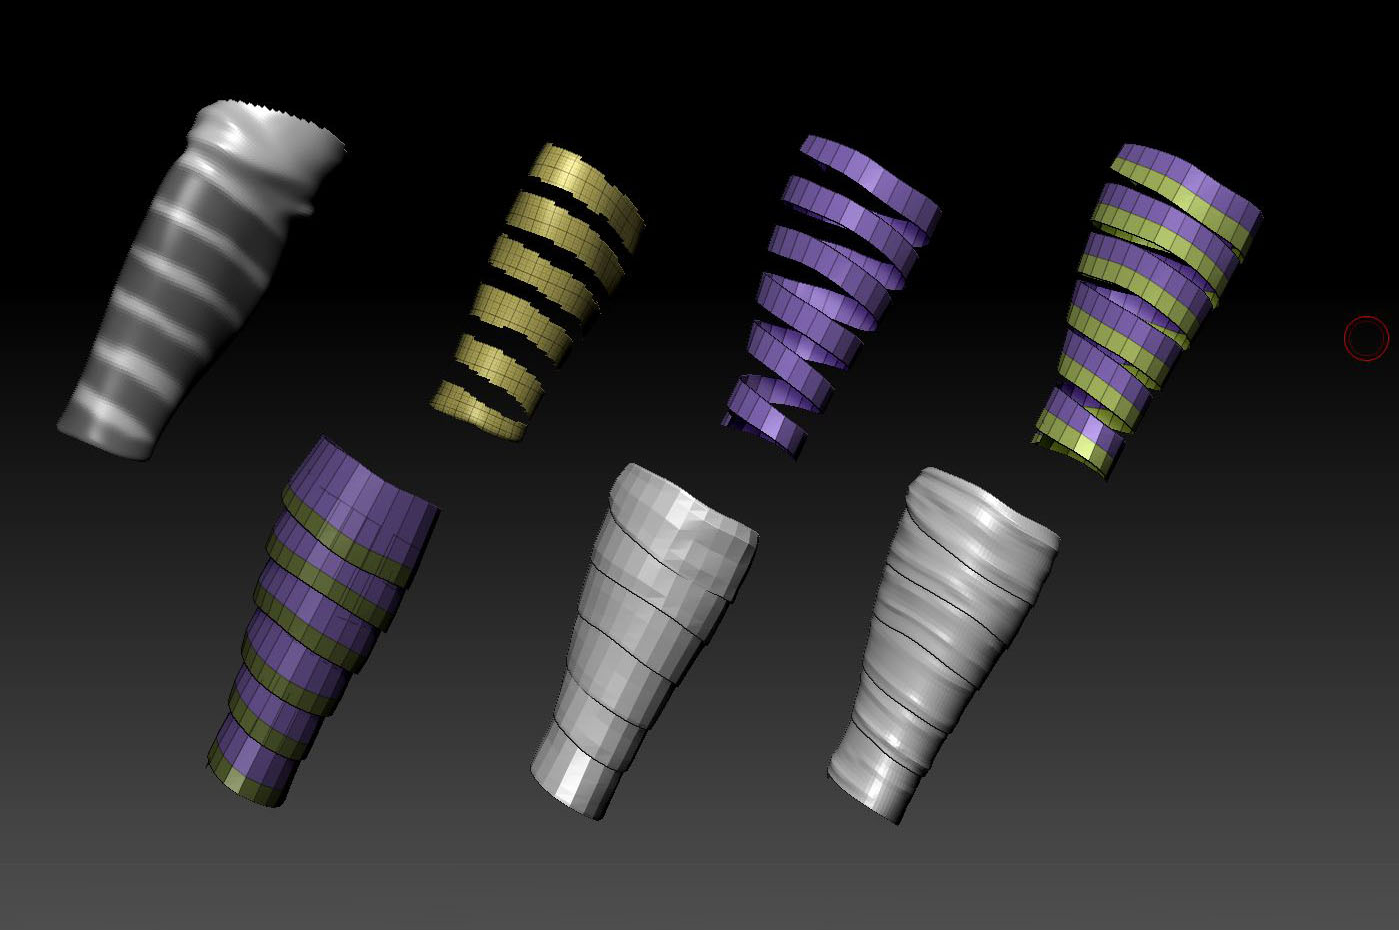
05. Make belts
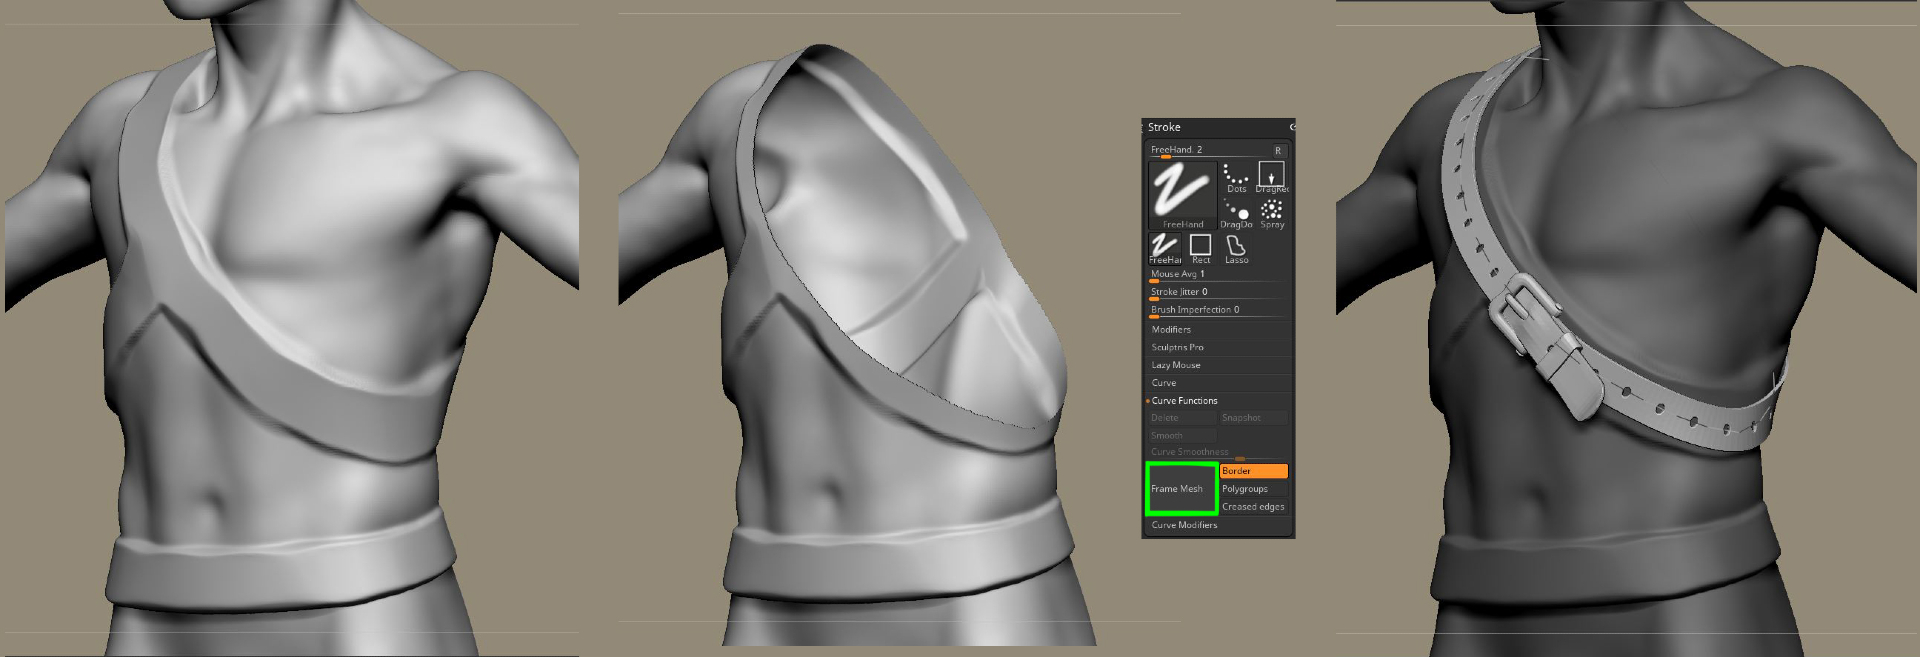
(Image: © Claudio Amoroso)
Modelling and adjusting belts can exist a time-consuming process, but creating smart Curve Brushes can help yous speed things up. In this case, you can hands create a simple brush by modelling just 1 buckle and a short portion of the belt. This mesh needs to be split into three polygroups which will exist the get-go, the middle and the cease of your curve stroke. Make sure the middle 1 is tileable.
Click CreateInsertMesh from the brush carte du jour, then activate Curve mode in the Stroke menu. Activate Weld points and bring up the Curve Resolution value to 25 in the Brush Modifier carte.
06. Model props
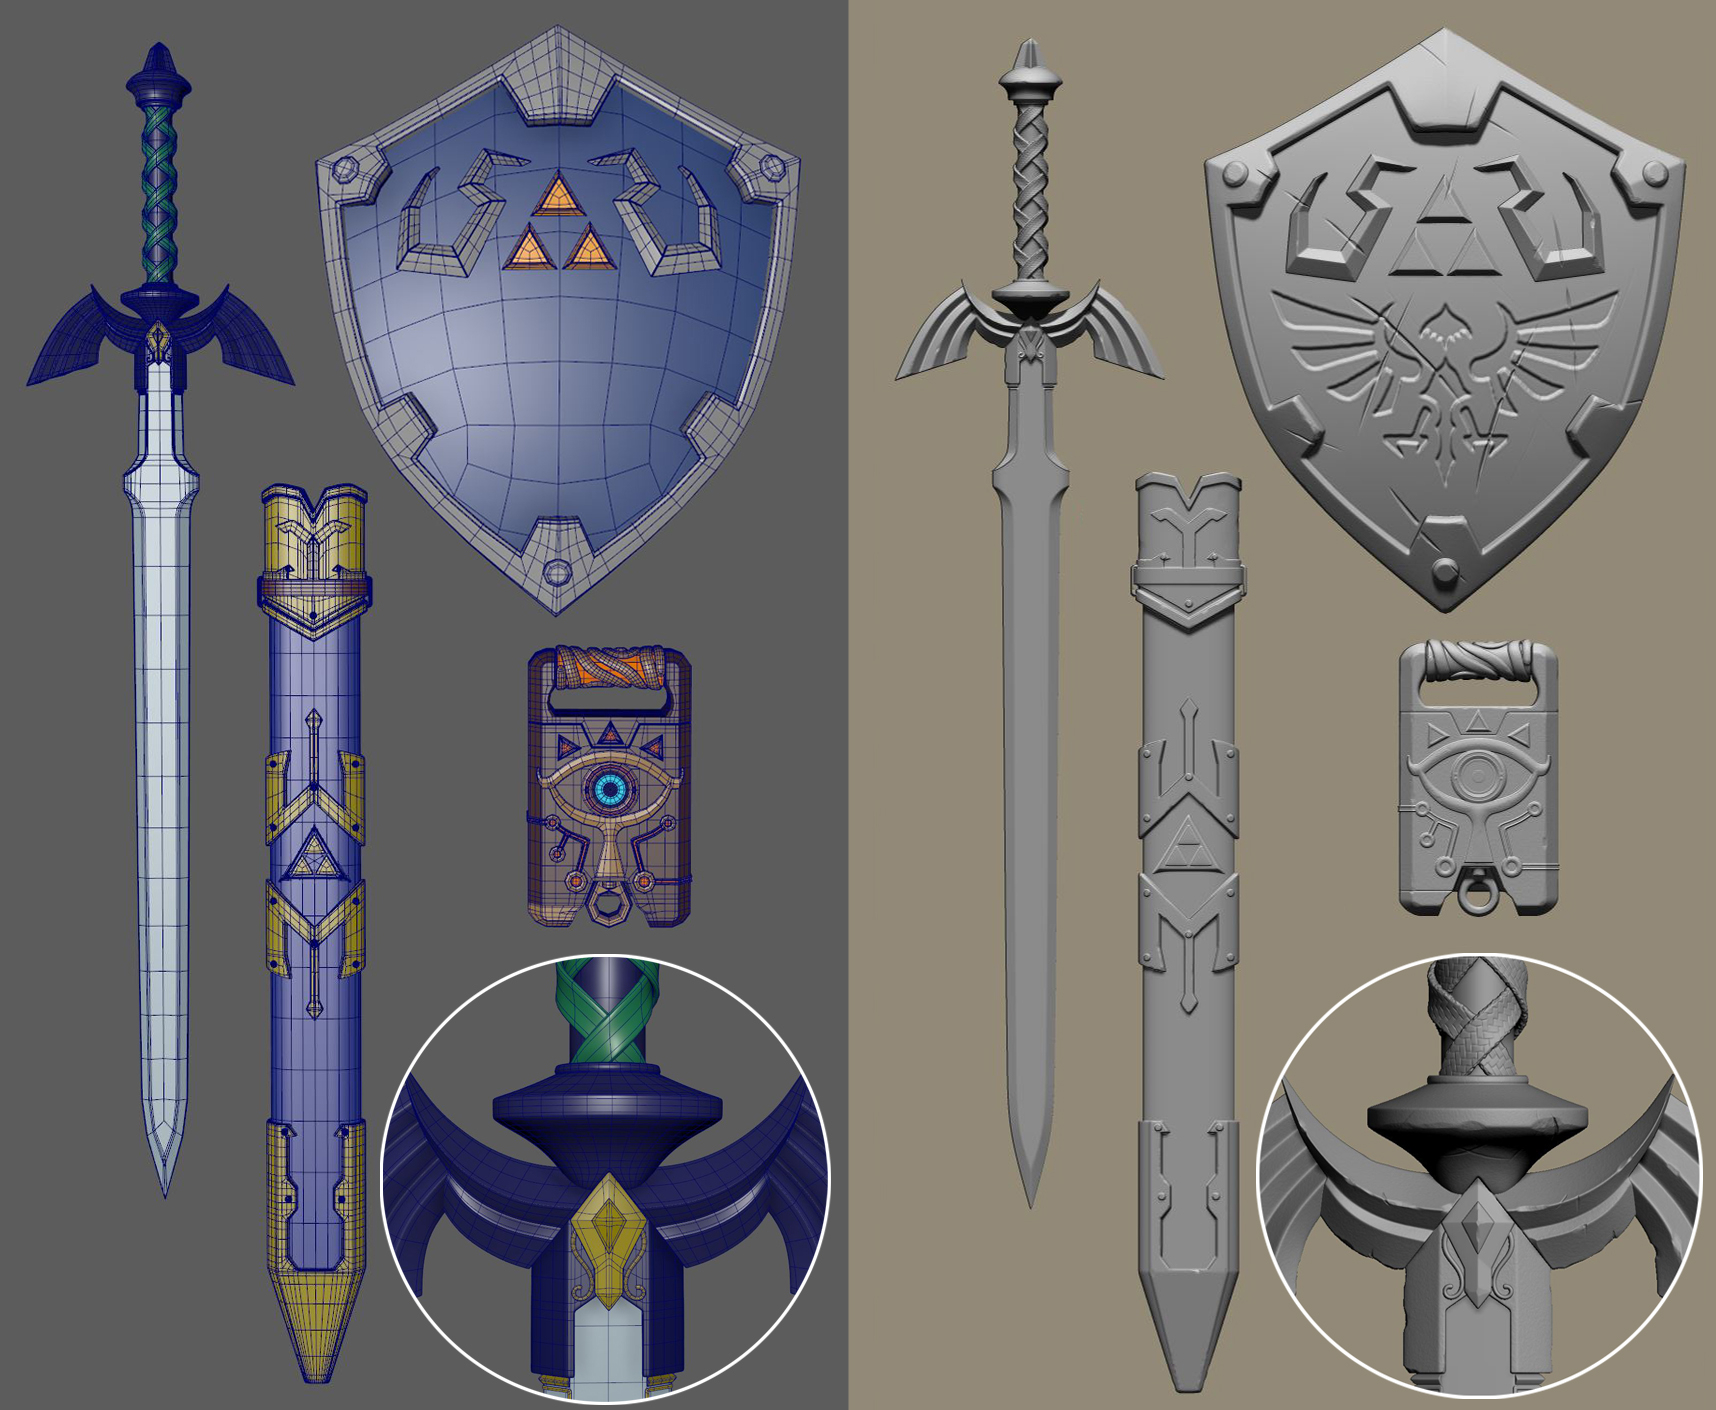
(Epitome: © Claudio Amoroso)
For modelling the props, you can apply Maya as well every bit any poly modelling software you want, simply continue in mind that you are going to split up those geometries when you lot bring them back to ZBrush. And so, apply support edges and don't go too crazy with polygonal details, yous can still sculpt them.
07. Use cloth simulation
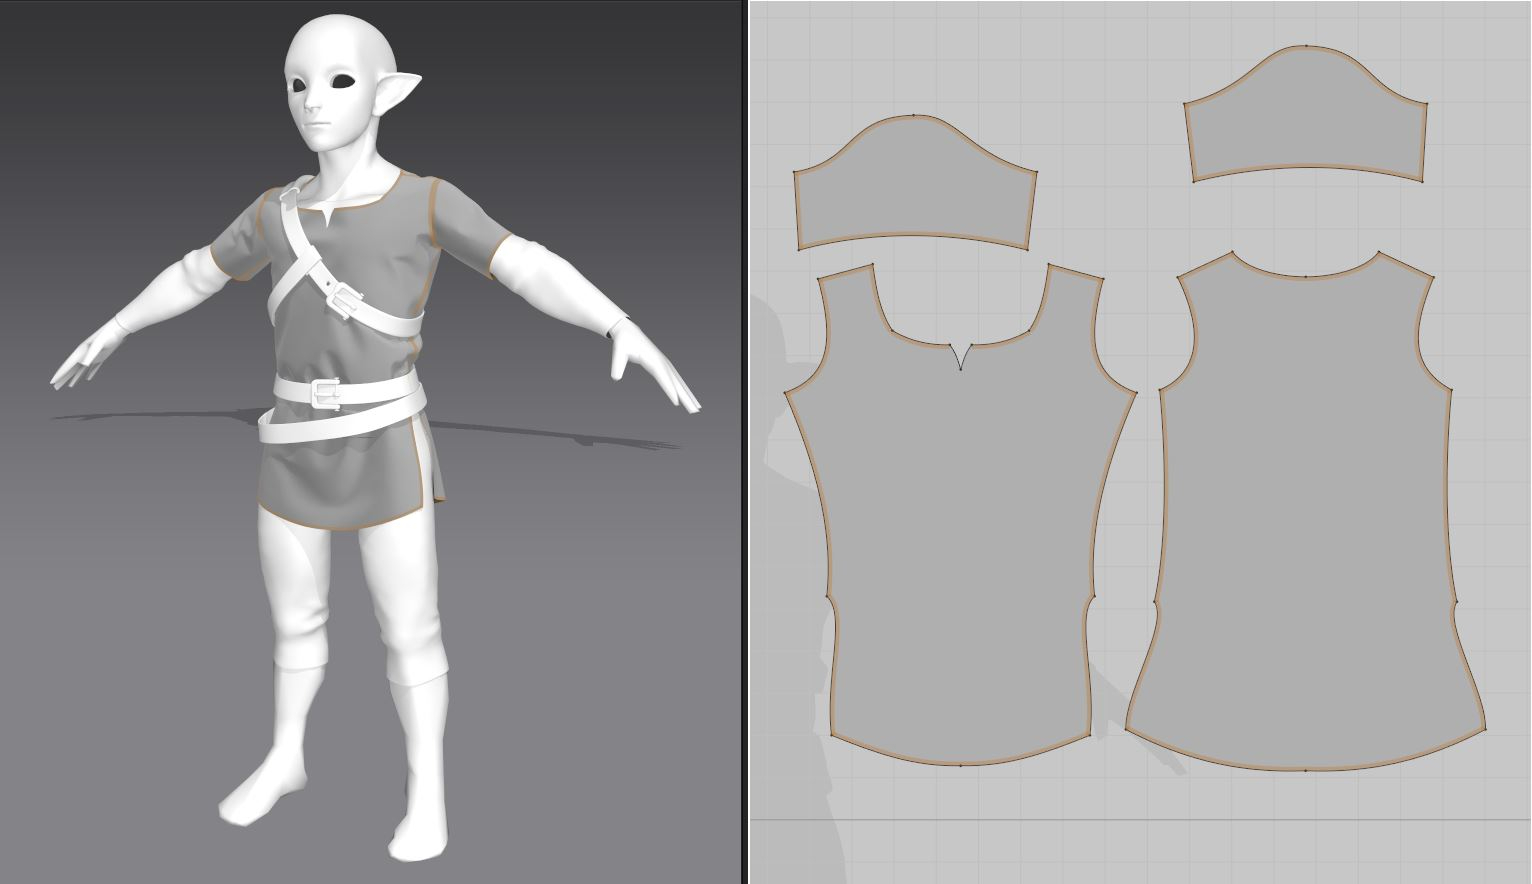
(Image: © Claudio Amoroso)
Simulations can exist a corking fashion to heighten clothing details. Create a unproblematic mesh that fits your model, and then unwrap information technology making UV shells as though they were bodily textile pieces. And so use Morph UV to unwrap the actual mesh and MakePolymesh3D to create a new tool with the unwrapped geometry. Yous tin can now export this mesh to Marvelous Designer forth with a decimated version of the body to be used every bit a collider.
Outset sewing all pieces, and once that's washed you tin then start simulating the cloth. When you are happy with the issue just stop the simulation and export the mesh back to ZBrush.
08. Detail your model
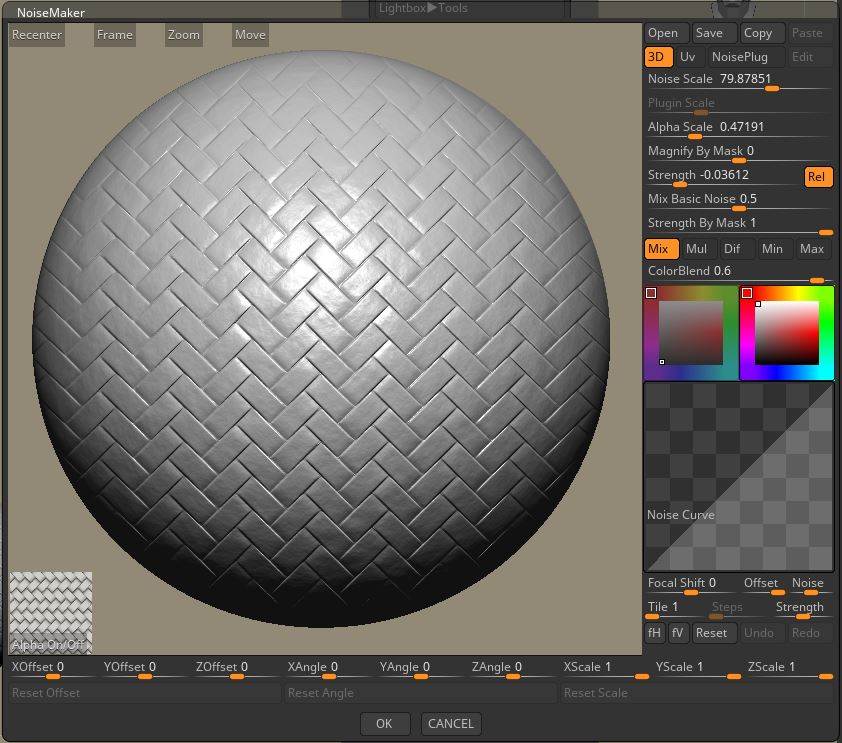
(Image: © Claudio Amoroso)
When it comes to detailing your model in ZBrush, sometimes, less is more. Keep in mind that on your final image many details are going to be blurred, and then ofttimes a simple noise on smaller subtools is more than plenty. Y'all can easily apply noises and tileable textures using NoiseMaker.
09. Begin polypainting
(Image: © Claudio Amoroso)
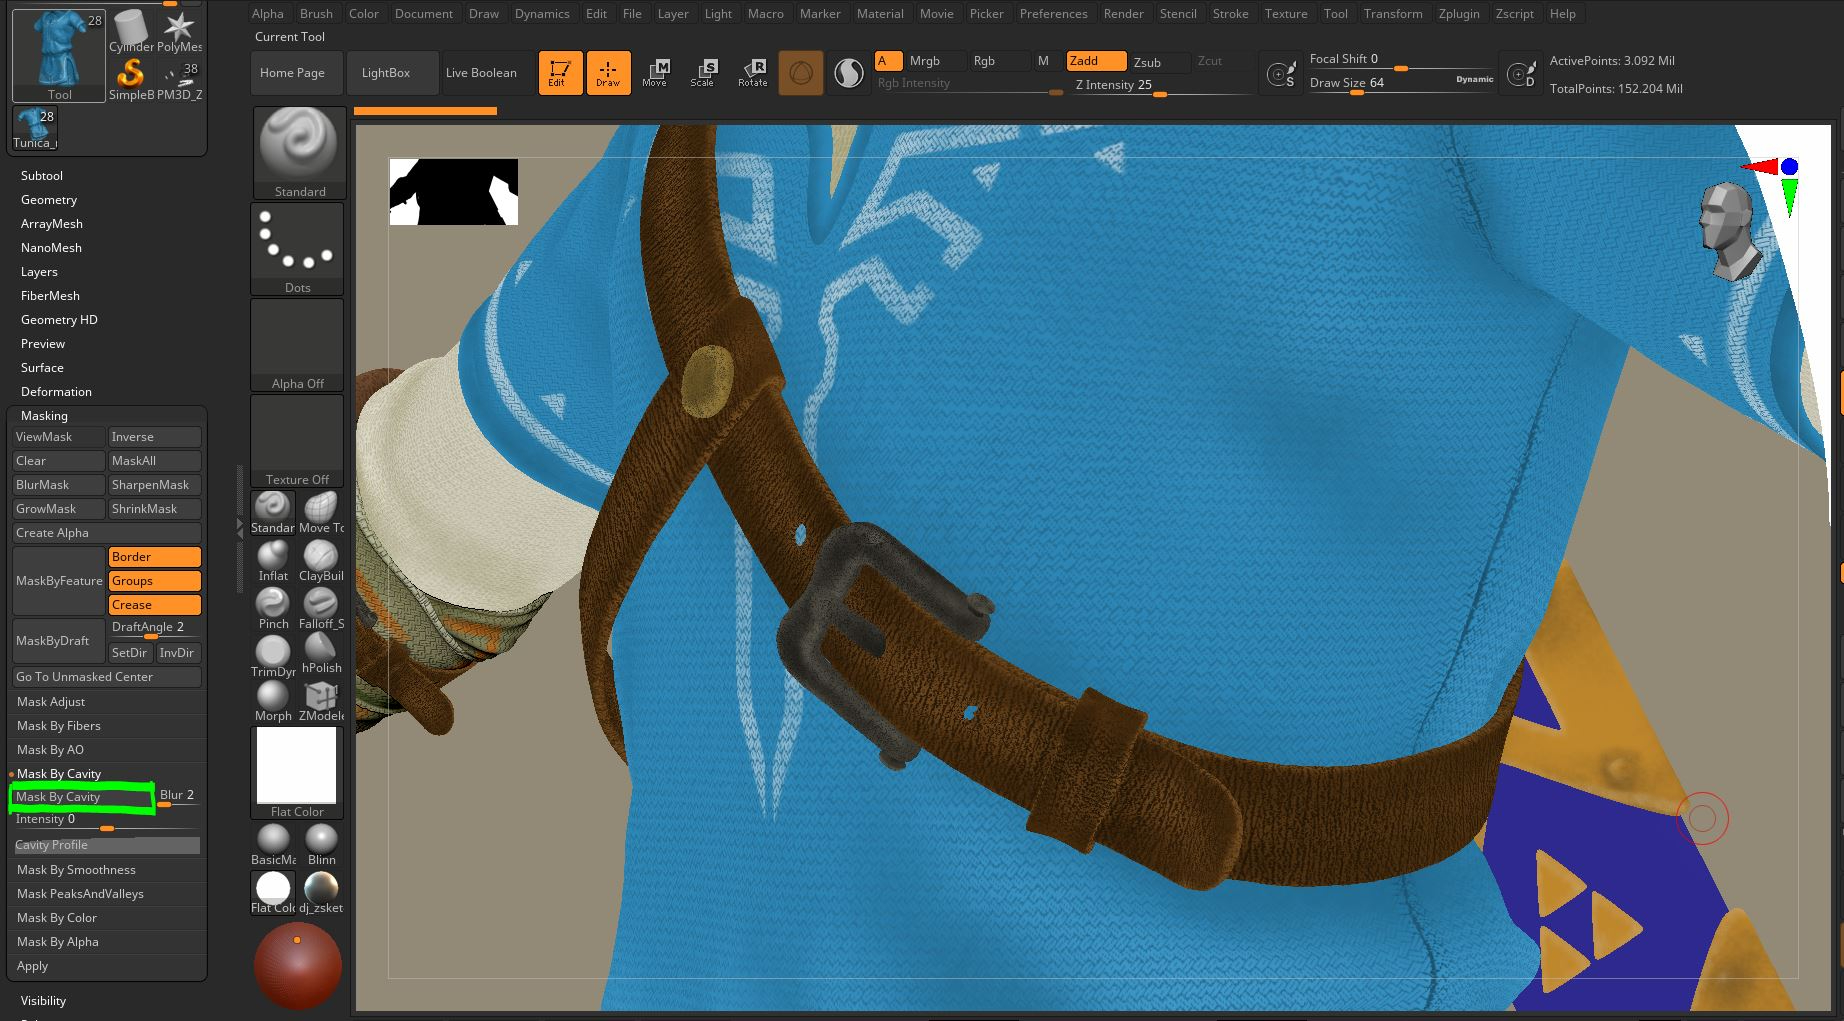
Now that your sculpting is completely detailed, you tin first polypainting your model. You can set up your castor as if it was a real airbrush, employ Spray Stroke and Alpha08, then set the Scale Variance and Color Variance to 0. Start with a midtone using Fill Object in the Color carte.
Then, using a low RGBintensity, paint a darker color into cavity areas and a lighter colour onto the protruding areas. This will brand all volumes stand out. At this stage paint texture details like decorations, surface damage or dirt. Lastly, take advantage of the sculpted details using Mask by Cavity in the Masking bill of fare, and invert the resulting mask. At present yous tin paint inside micro-cavities to add together on the texture all the details that have been sculpted, and brand them stand out fifty-fifty more.
10. Pose your model
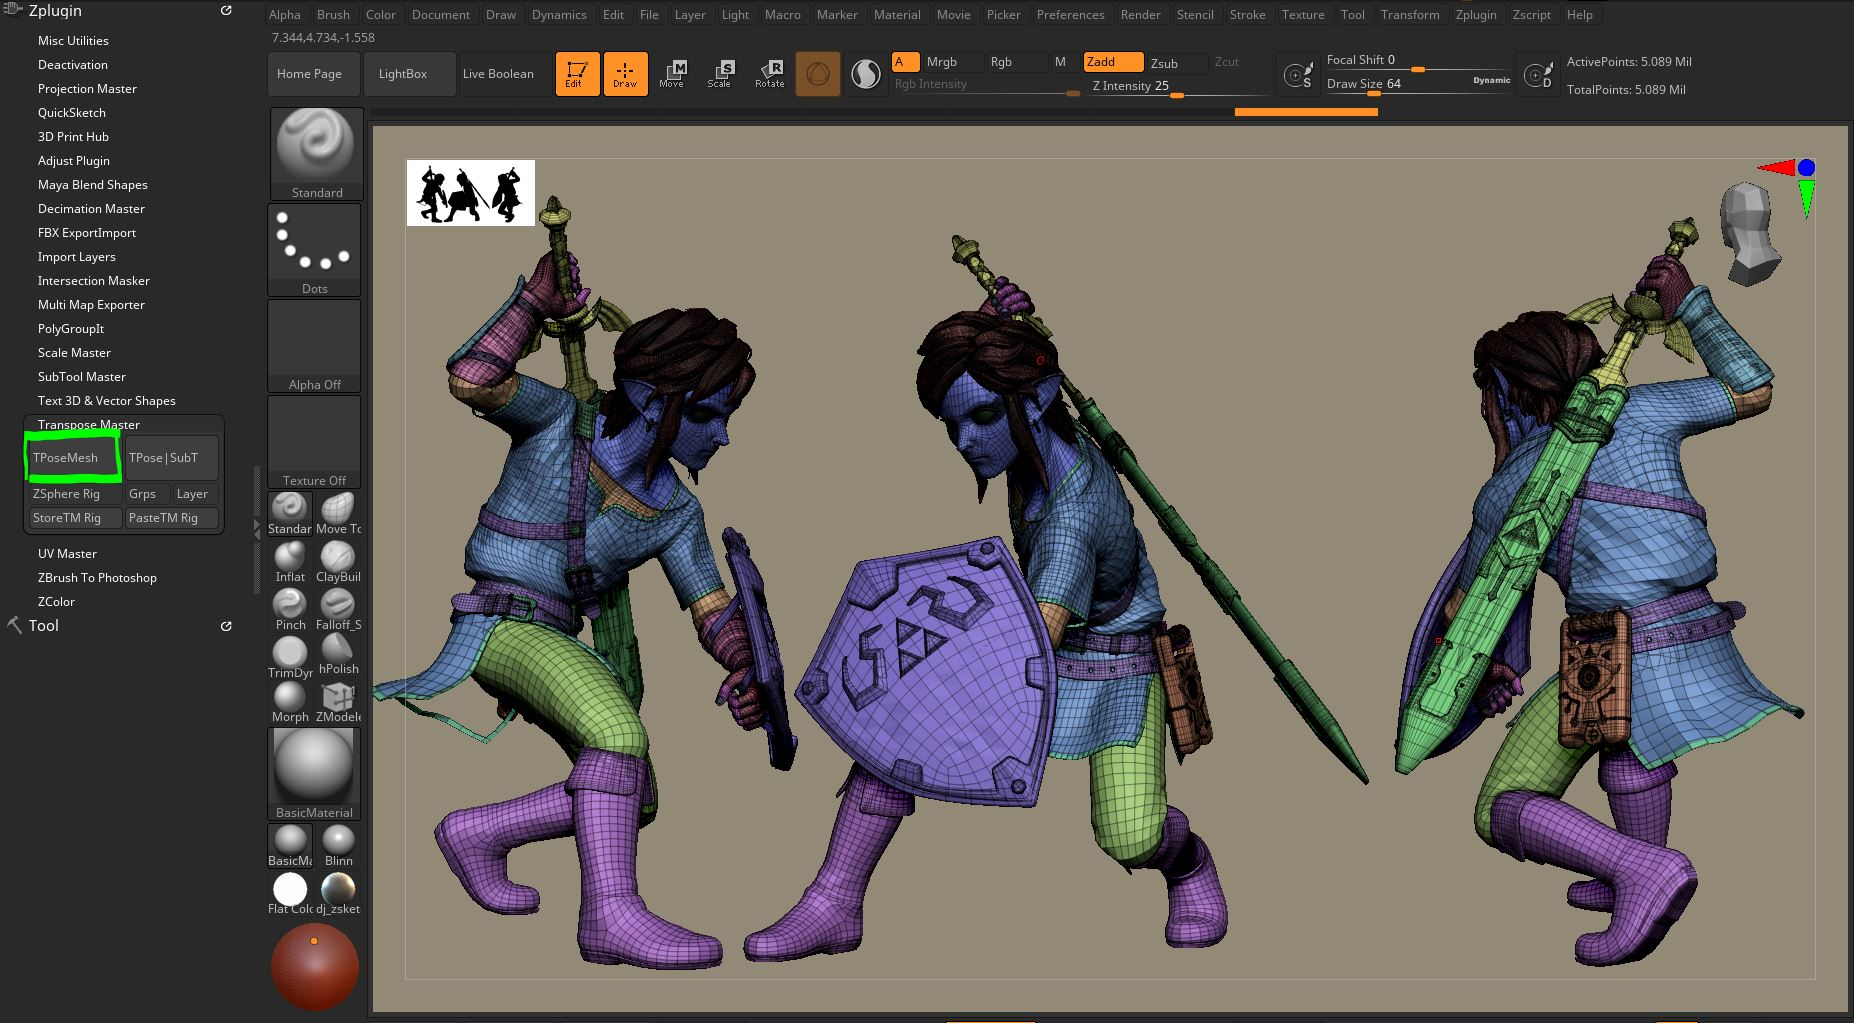
(Image: © Claudio Amoroso)
To pose your model simply use the Transpose Primary tool. Continue in mind that yous will need to clean upward the sculpt, so the more farthermost the pose is, the more than time it volition have.
Before posing it would be a good practice to make a quick sketch of the terminal shot, this fashion yous are going to be more aware of how to pose your graphic symbol. When posing, keep watching the model all around and try to keep the centre of gravity counterbalanced in any view.
11. Detail the hair
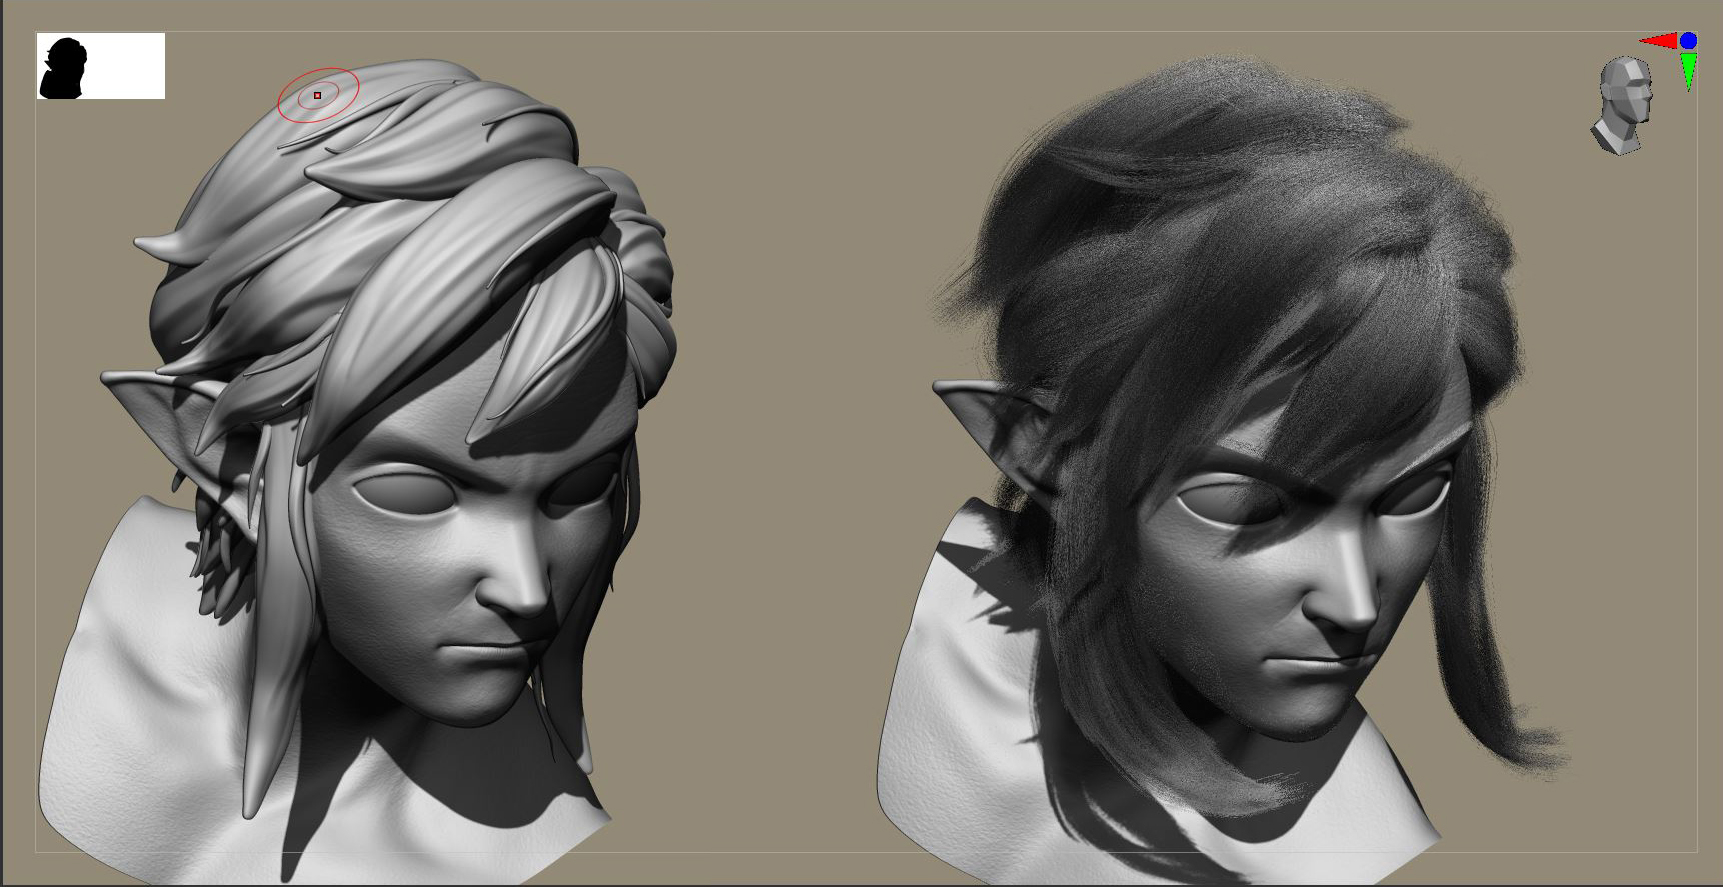
(Epitome: © Claudio Amoroso)
Depending on the expect you lot are going for, you lot may want to keep detailing the pilus clumps y'all created earlier, or you can apply the FiberMesh tool. Since you kept all your clumps from the beginning, yous can use them equally reference to build fibre clumps. Just build a straight clump with FiberMesh and using Ghost mode, try to lucifer the position of the reference mesh. Exercise this for each dodder.
12. Render passes
(Image: © Claudio Amoroso)
At present you tin can outset rendering your passes. First of all, set your photographic camera and lock it, then set your BPRshadow in the render tab. Make sure all your subtools are set to the maximum subdivision level just by clicking AllHigh. Use a basic material for all subtools and bring to 0 any specular values from the Material Modifiers, this will give you a lot of control over the materials just by tuning the diffuse and specular passes in Photoshop. If possible double the size of the document and prepare SubPixel Antialiasing to 3.
You need to render a unmarried pass for every light you want to use, and so just movement the calorie-free to the right angle and click render. For each calorie-free y'all are going to need the relative shadow pass and a specular pass, for this you tin render all subtools with the standard material ReflectedMap.
One time you take all the lighting passes required, you can then start creating all sorts of render passes such as Ambience Occlusion, SubSurfaceScatter, Depth of Field, Fresnel, FlatColor, ID, and then on.
13. Composite the concluding image
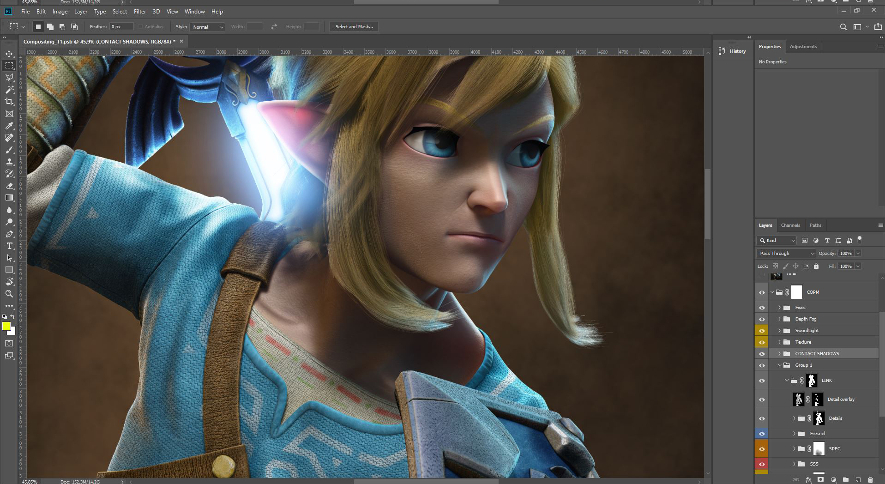
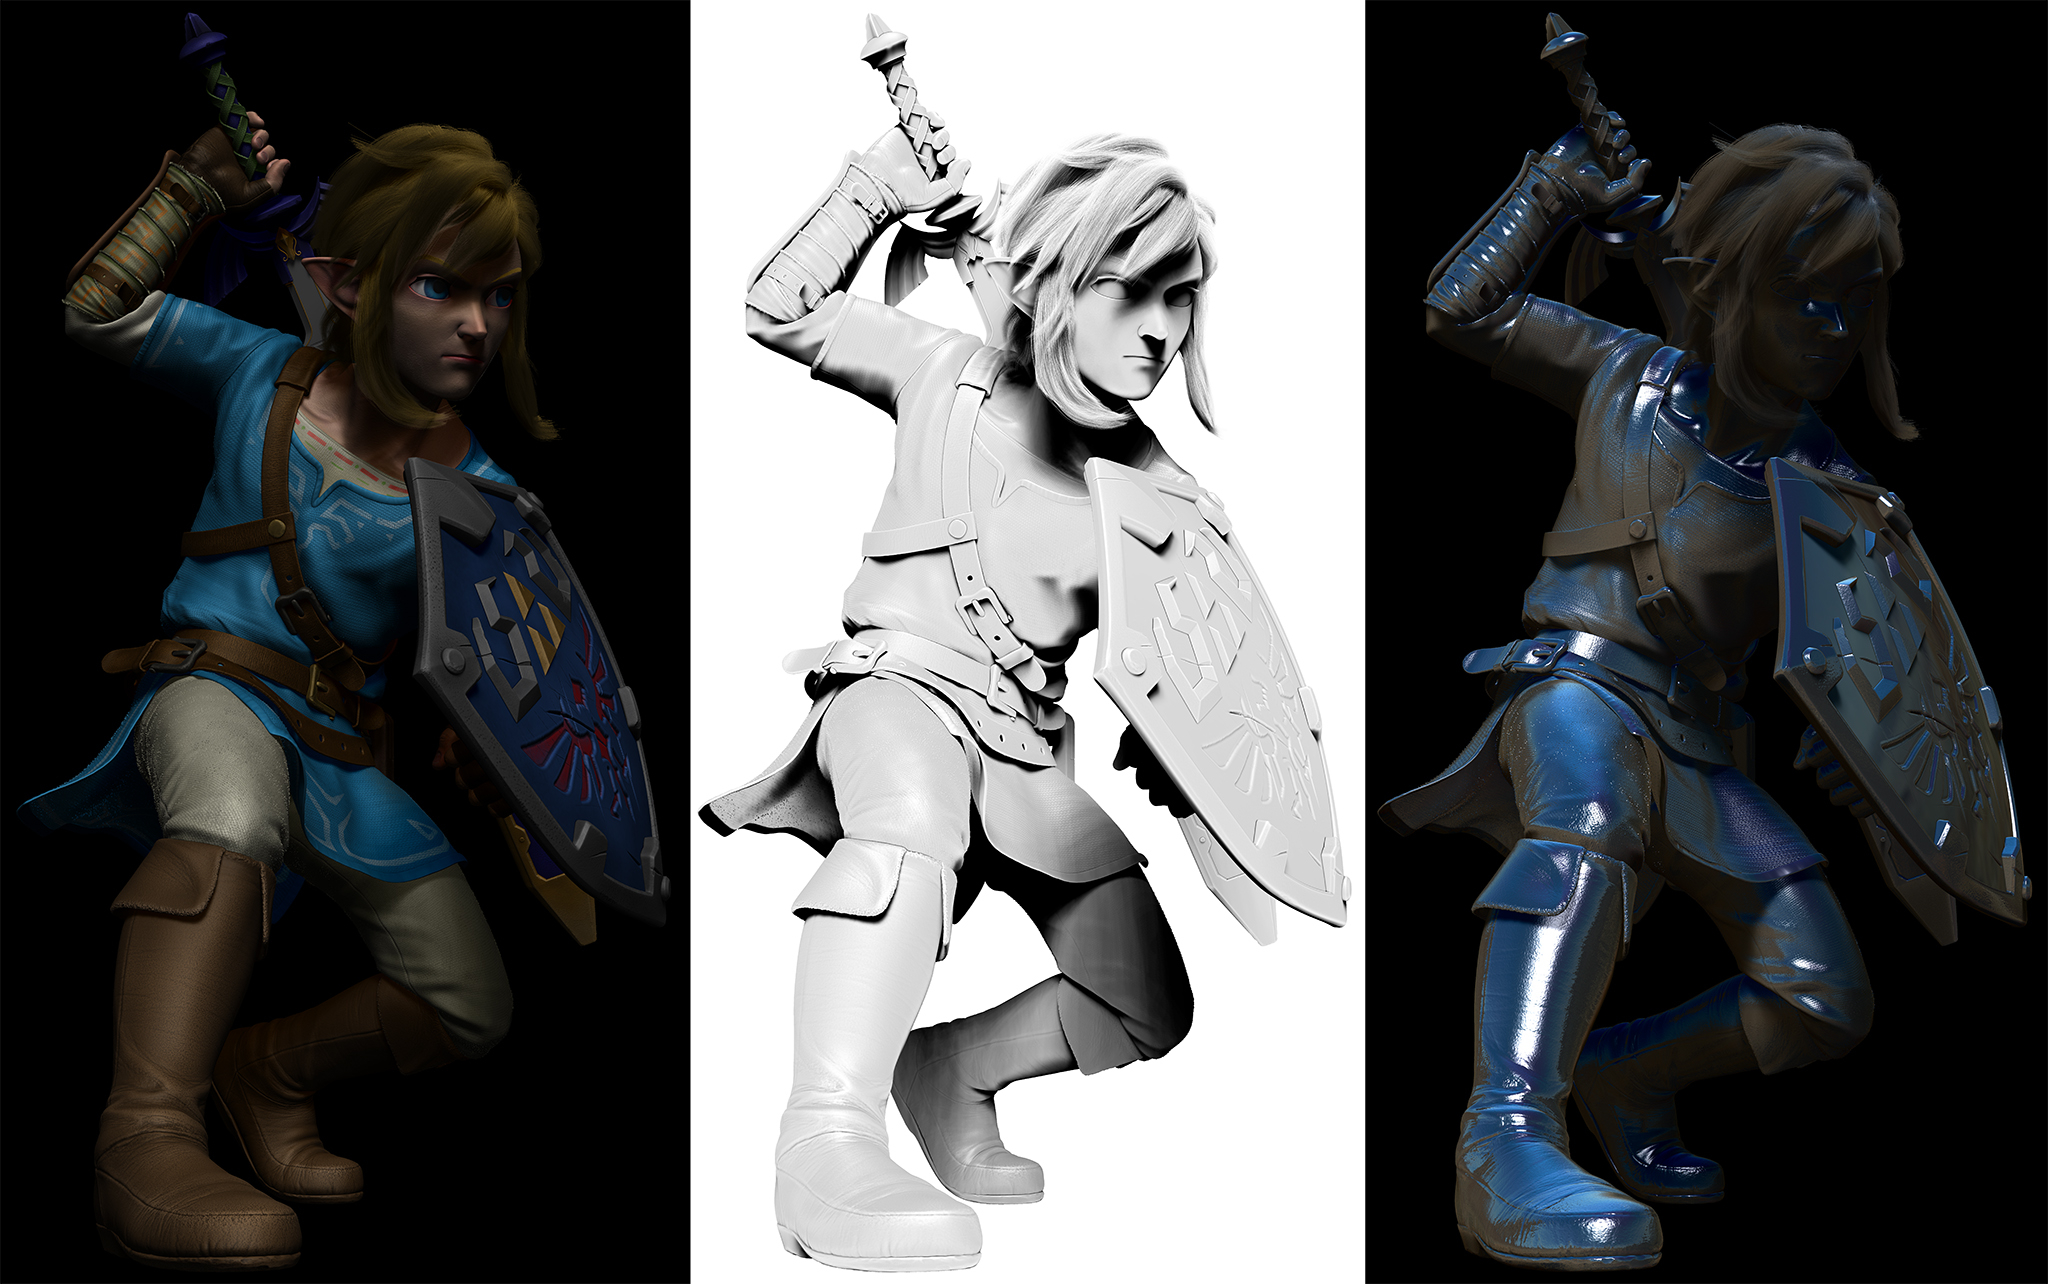
(Prototype: © Claudio Amoroso)
Bring all render passes into Photoshop and kickoff building the final image. Keep in listen that each light laissez passer must exist set to Screen mode and masked with the respective shadow pass. By tweaking the Fill value of each layer and adjusting their color, you can obtain the lighting you lot want. Utilise IDs to create masks and work on isolated areas in which you can achieve the correct material look for your character.
Once you are happy with the result you tin add together final touches to the epitome such as bloom effects, clay layers, and depth of field.
This article was originally published in 3D World , the earth'due south best-selling magazine for CG artists. Subscribe to 3D World .
Related articles:
- Your favourite video game characters reimagined
- Overlooked ZBrush tools you lot need to know
- Tips to master ZBrush
Related articles
Source: https://www.creativebloq.com/how-to/create-zelda-fan-art
0 Response to "Its Okay to Not Be Strong Zelda Fan Art Zelda Fountain Fan Art"
Post a Comment